

React Starter Guide: Assets + Tools I've used
but really, any frontend js framework could apply these


So... uh hey-?
God knows why I'm so terrible at staying consistent here, but again I'm usually always this irregular whenever it comes to social media platforms of any kind. I'm trying to improve. I PROMISE.
Unlike, my inconsistency, socially - you guys would be delighted to know that I'm not as irregular with my learning journey (shocker, I know). I've come to the near end of learning React, however, this blog won't necessarily be about how far I've come but more about how I initially even started my first project. I'll walk you through my thought process, and the tools I've used to create and deploy my project.
omg I forgot how fun blogging was dsjnsjsak I feel so professional
I'll be building a very simple static react website, so we can focus more on the behind-the-scenes of it all.
I'll be using Scrimba's first react solo project as an example
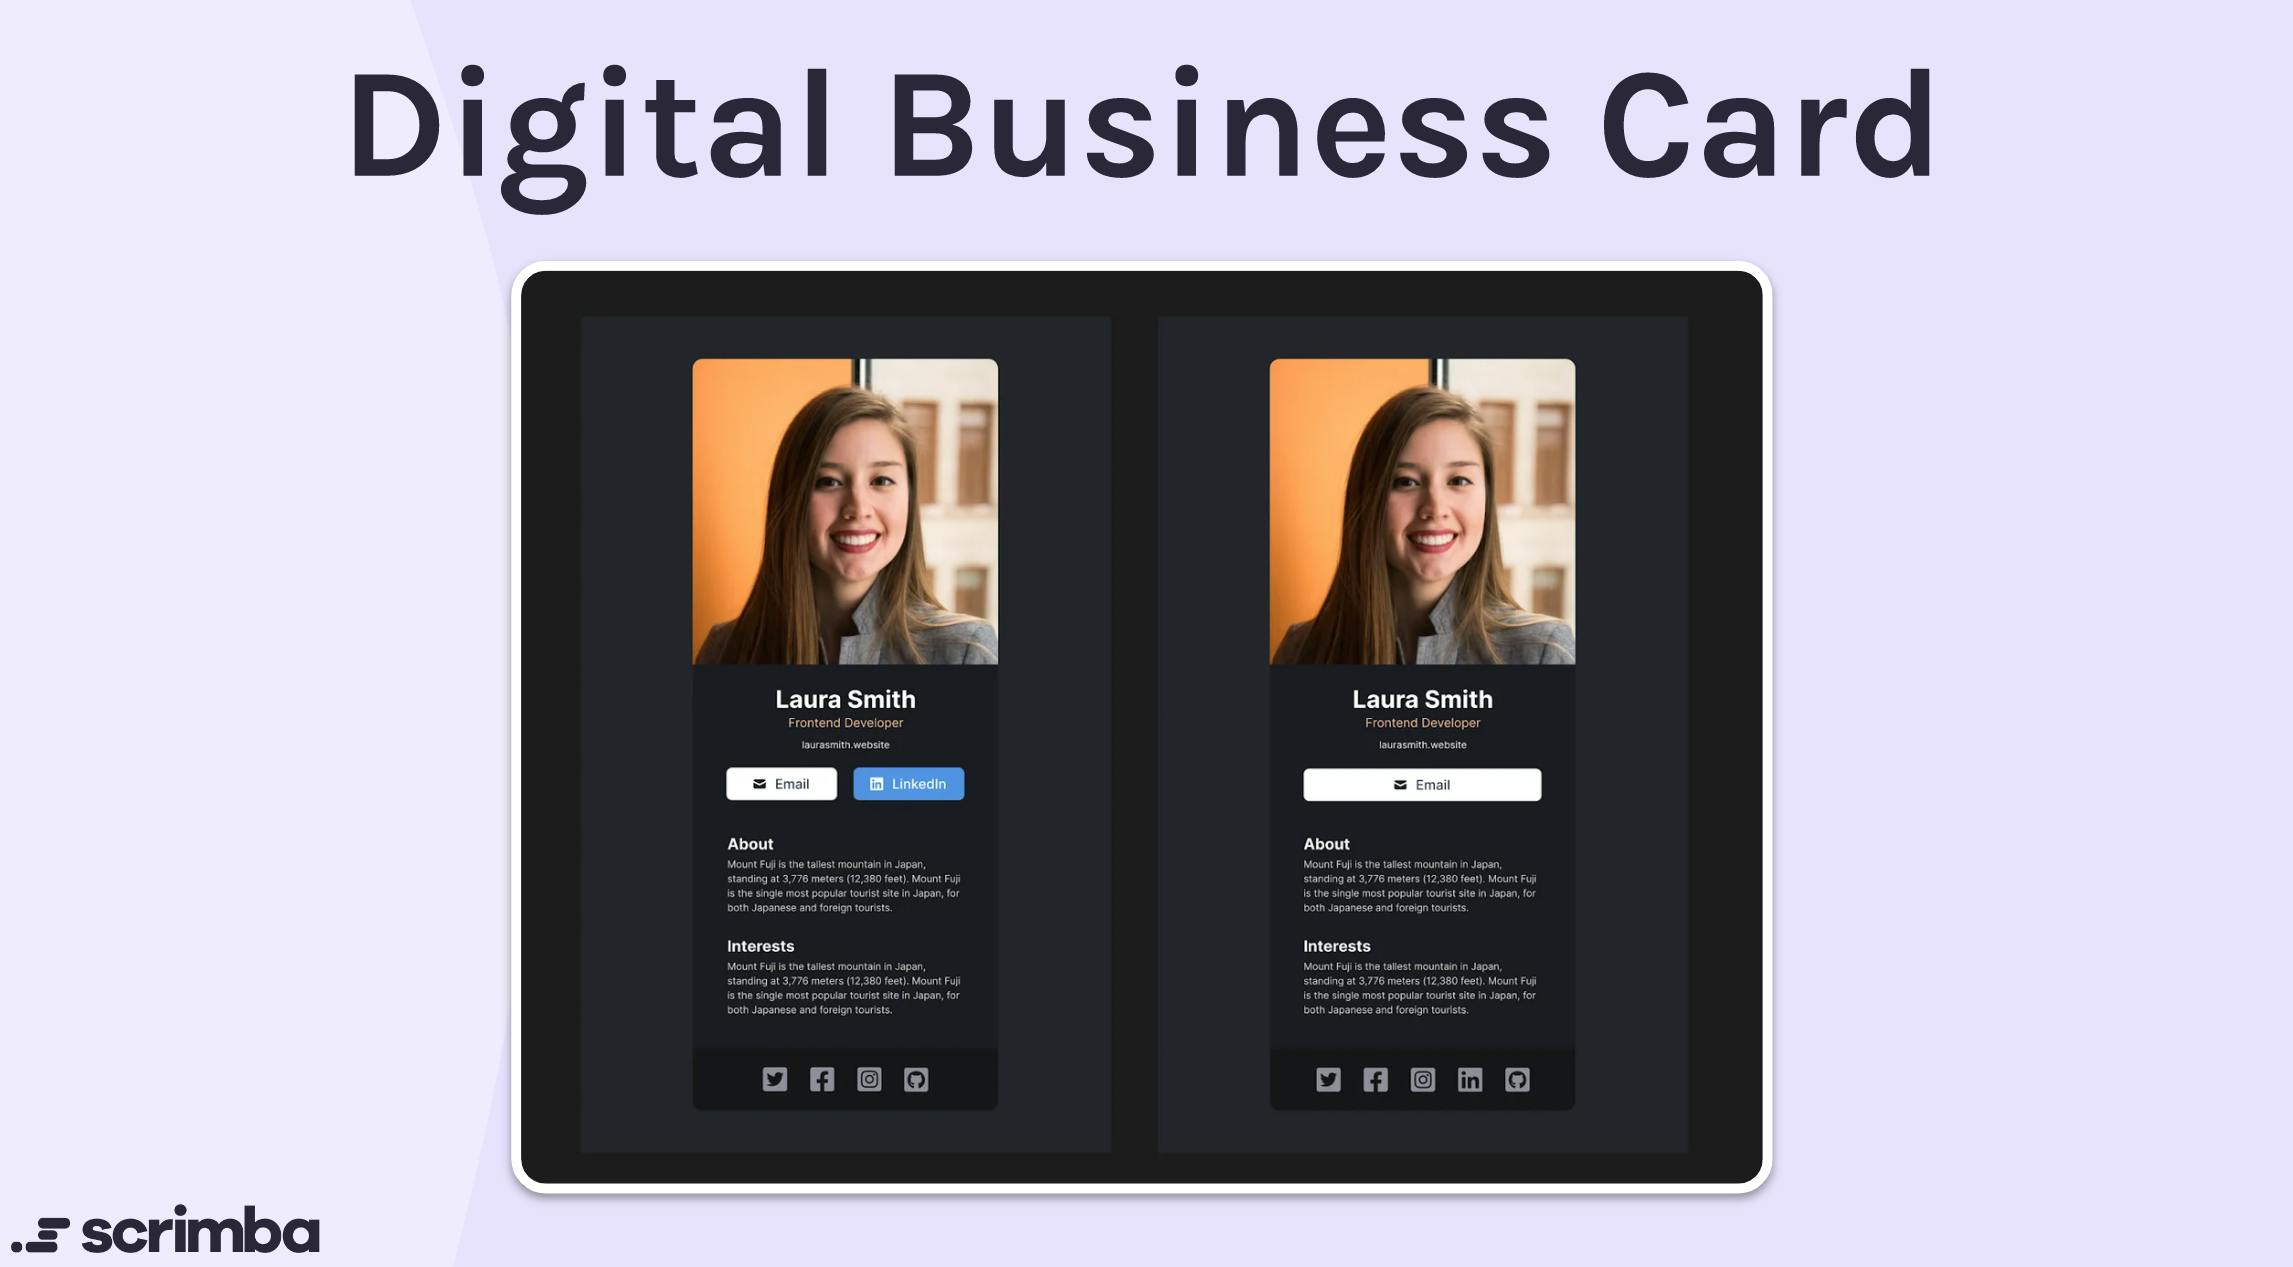
You'll find the Figma source file here
Mind Mapping 🧠🤔
So, even before you start writing any line of code, I would urge you to make a mental map of the things you'd need to do, to complete the task.

This is basically, the digitized version of what my thoughts were a month back when I did this project. Although I do prefer a pen + paper approach to mind mapping, you can do whatever.
Mind mapping is not only an amazing guideline but also REALLY helps you feel productive and eases you into the entire development process.
A way too in-depth Vite tutorial that literally no one asked for 🤓:
You've finished your mind mapping process, now what? Well, you start preparing how you can run React, locally. In this tutorial, we'll be using Vite, cause in their words: Vite. js is a rapid development tool for modern web projects. It focuses on speed and performance by improving the development experience.
And honestly, after using it a couple of times, I can testify it genuinely is amazing. It's also, pretty beginner-friendly after you've banged your head a few times trying to figure out how to make their dist/build file. Lucky for you guys, there was a pretty simple solution to it, that I NOW know. But we'll come back to that, later on.
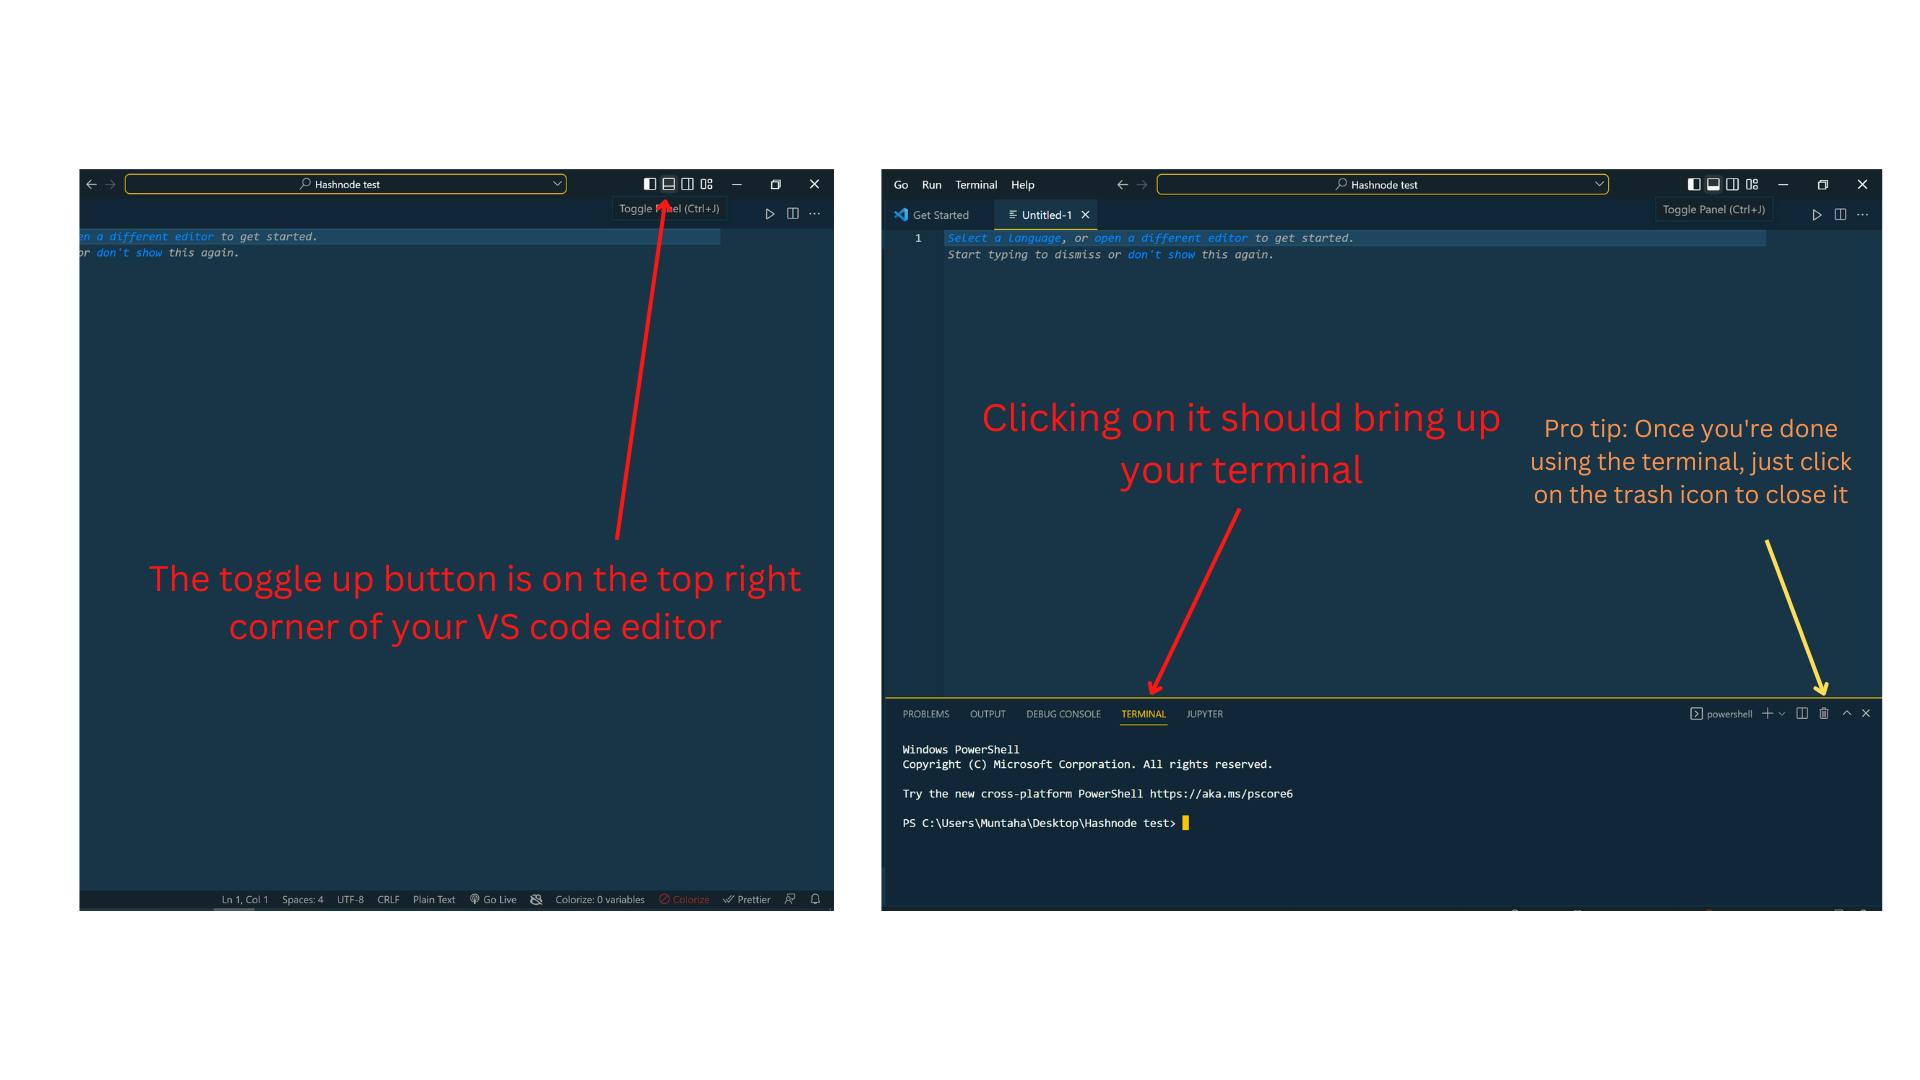
So, you'll have to start with opening yo goddamn terminal ( for my noobs that don't know how to open up a terminal, I've gotcha)
Mini VS Code Terminal Tutorial
ok, back to Vite:
To start Vite for your application, you'll need to type a couple of commands into your terminal
npm create vite@latest
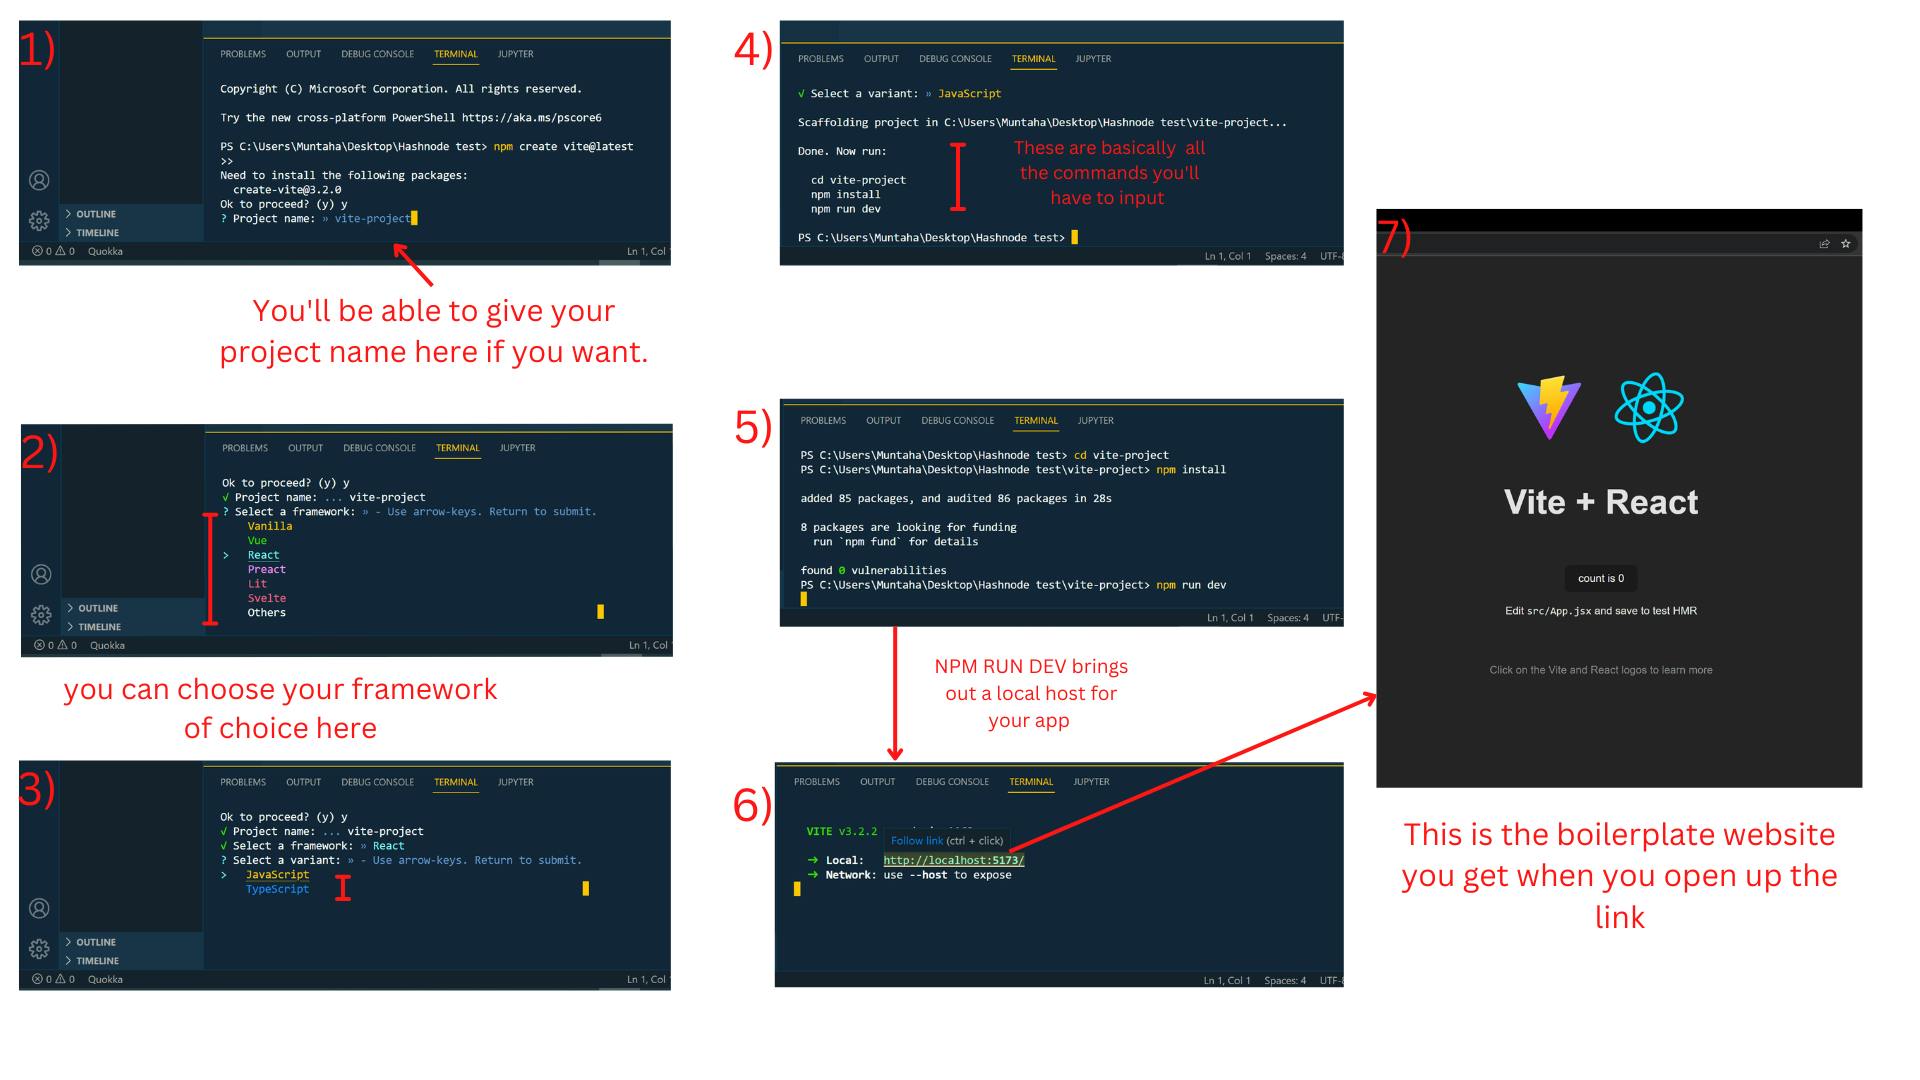
These are the rest of the commands you'll have to put in, just in case you didn't understand your terminals directions:
cd vite-project

npm install
npm run dev
Congrats! You've successfully enabled Vite (but there is still one last thing, more on that later). This should give you some boilerplate code, and I urge all of you to play around with the code a bit, before even thinking of deleting any of it.
Figma-to-Code mini walk-through 🚶♂️
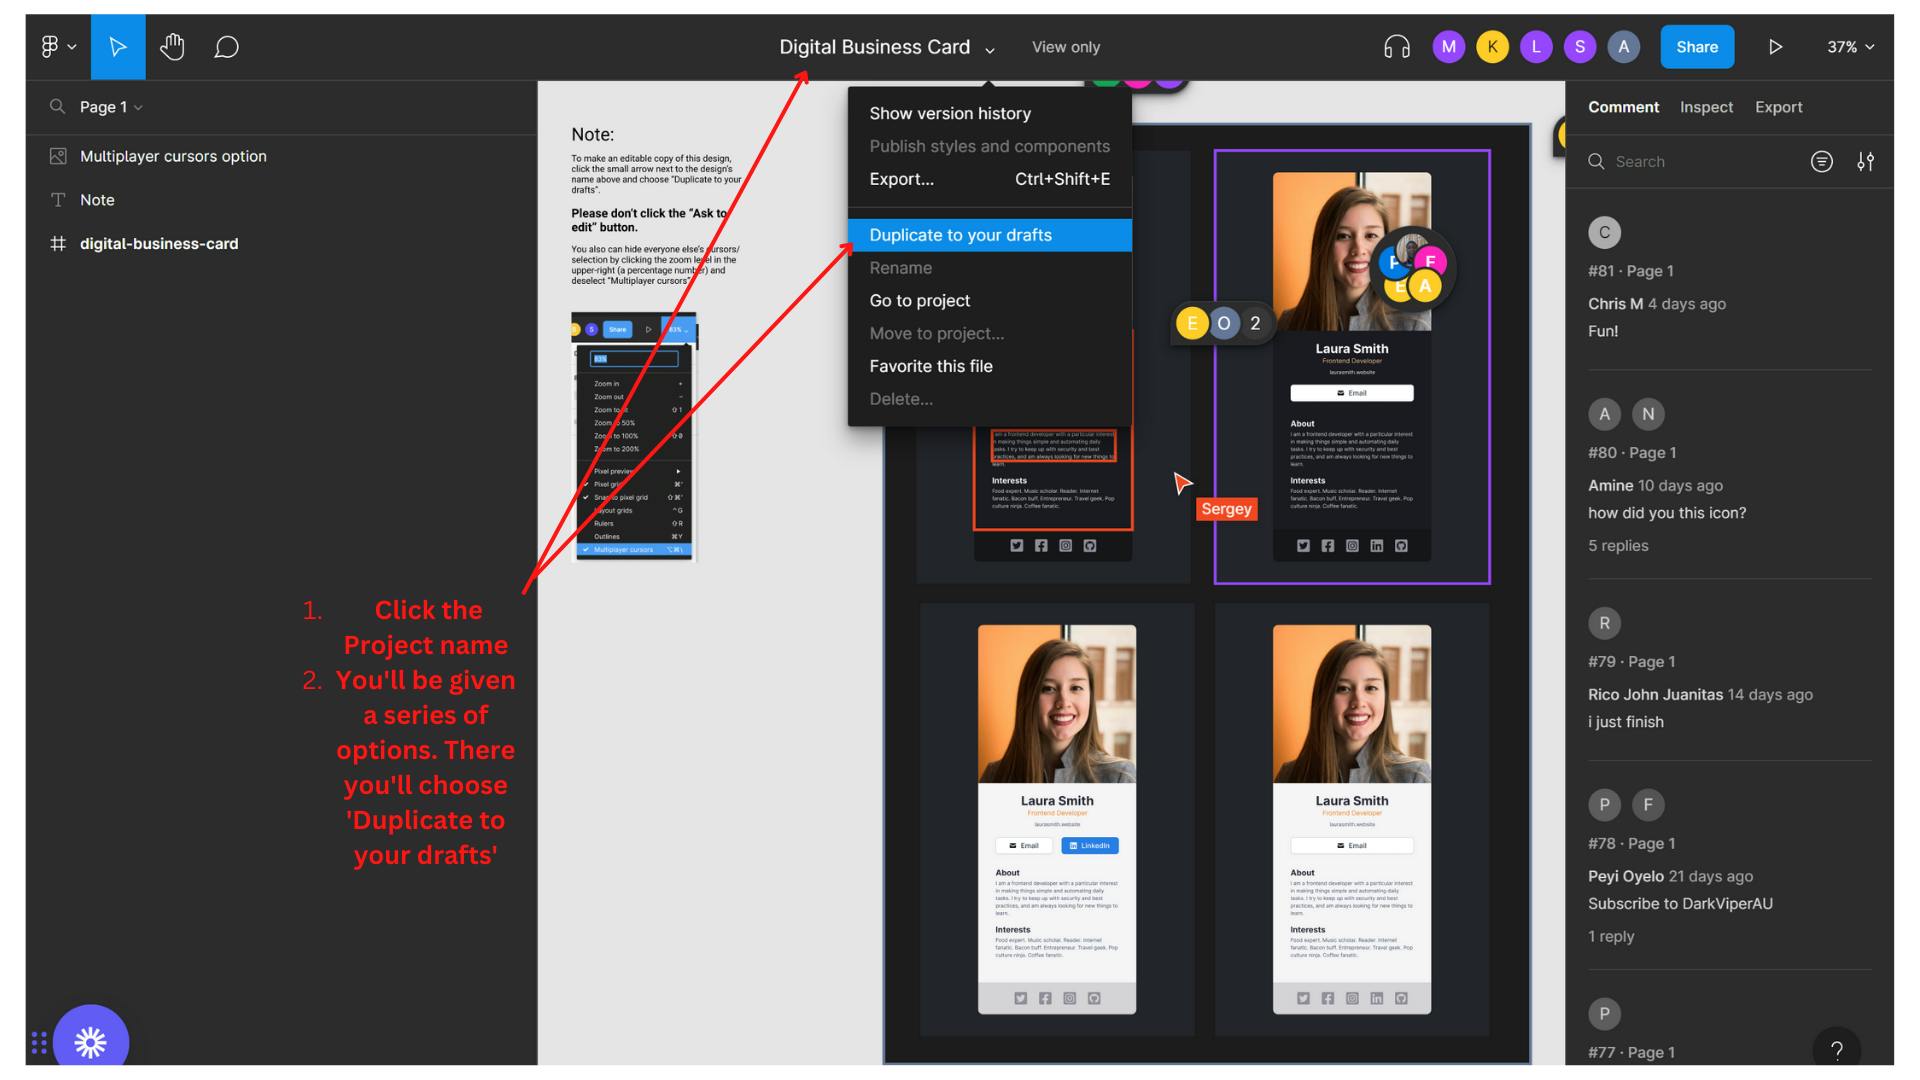
OK. so the first thing we'll do when we get a Figma source file, is we'll duplicate it to our drafts. This will allow us to make personal edits to it, without having to deal with the annoying floating cursors.
getting rid of the distracting cursors:
ok, so now that we have a much less distracting file, let's get to business.
To start implementing the design into our code, we'll primarily only need to know how to do three things.
How to export image files
How to find the CSS properties of our desired components
Figuring out the distance between neighboring items (for positioning purposes)
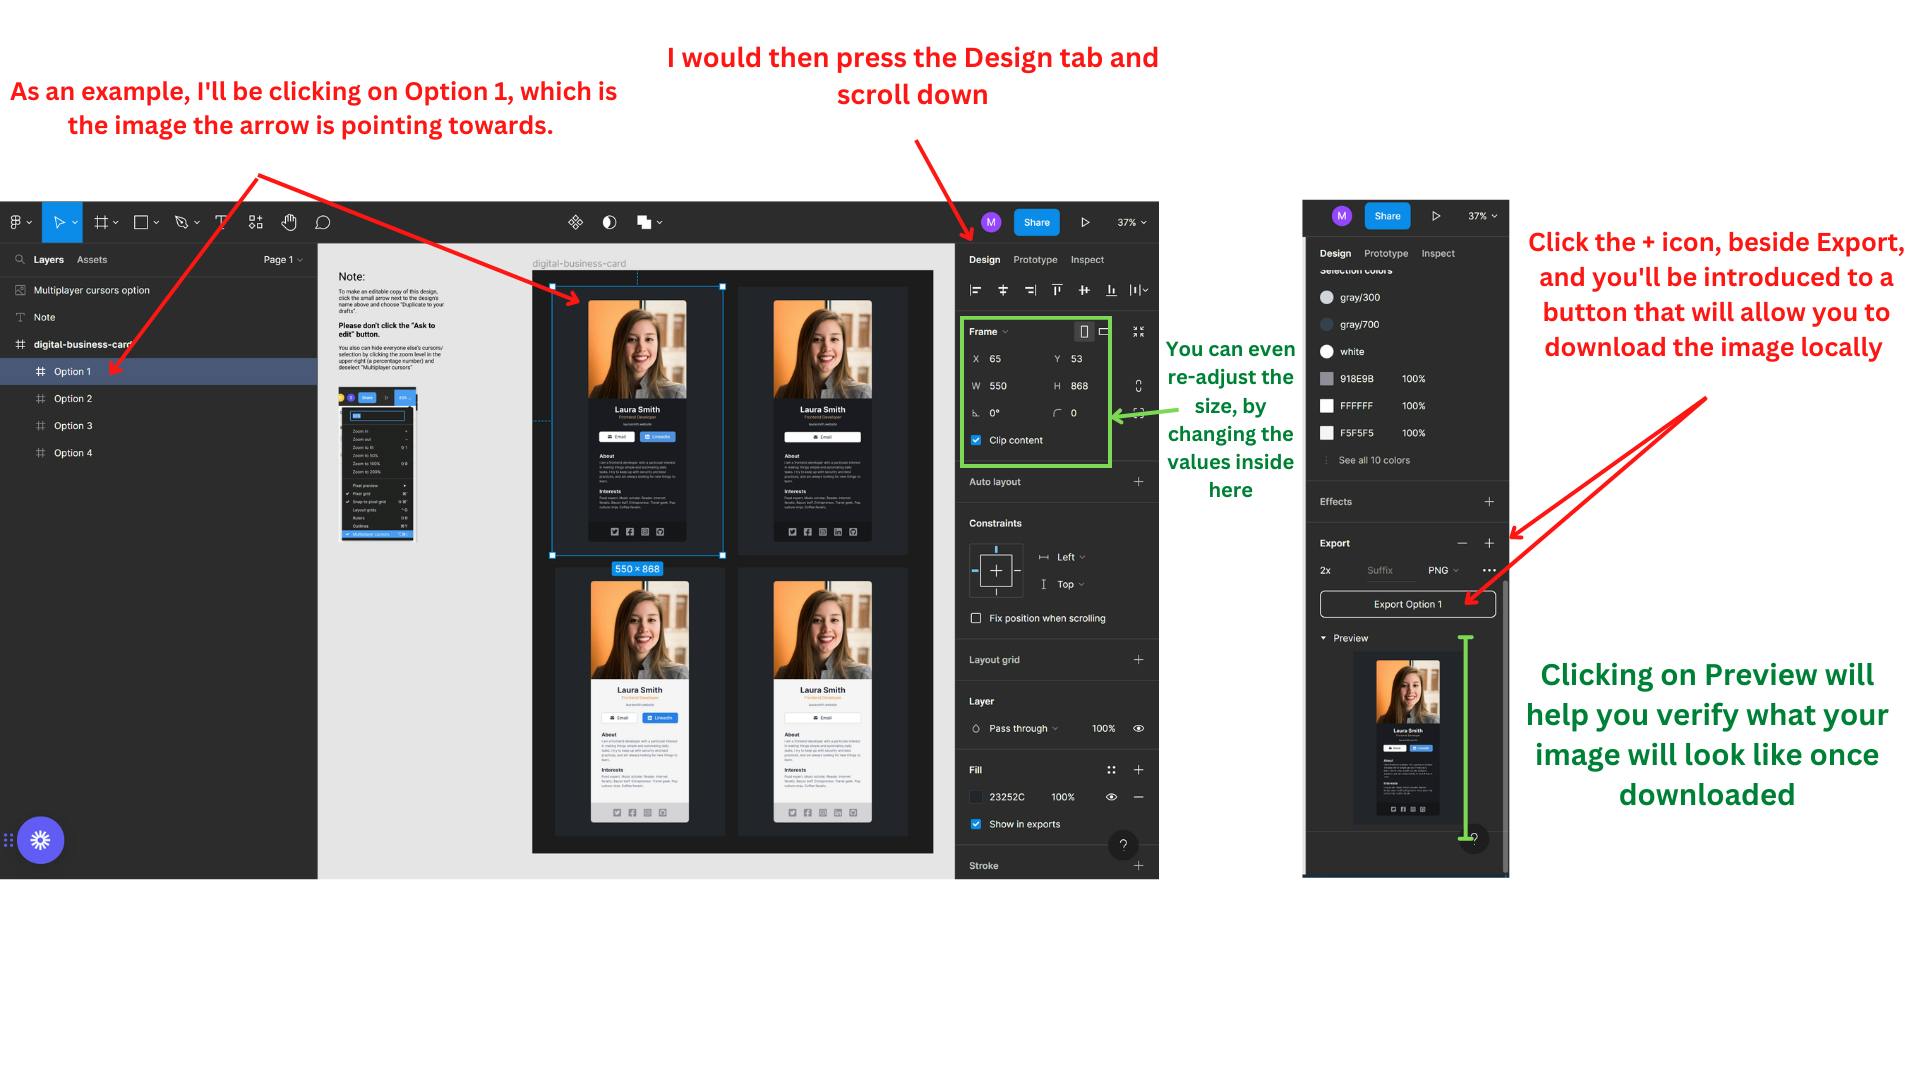
How to export image files:
At the top right of your Figma file you'll see three options
Design,Prototype, andInspectClick on the
Designtab and scroll down until you find ExportPressing it should open up an
Exportbutton that will allow you to download the image locally
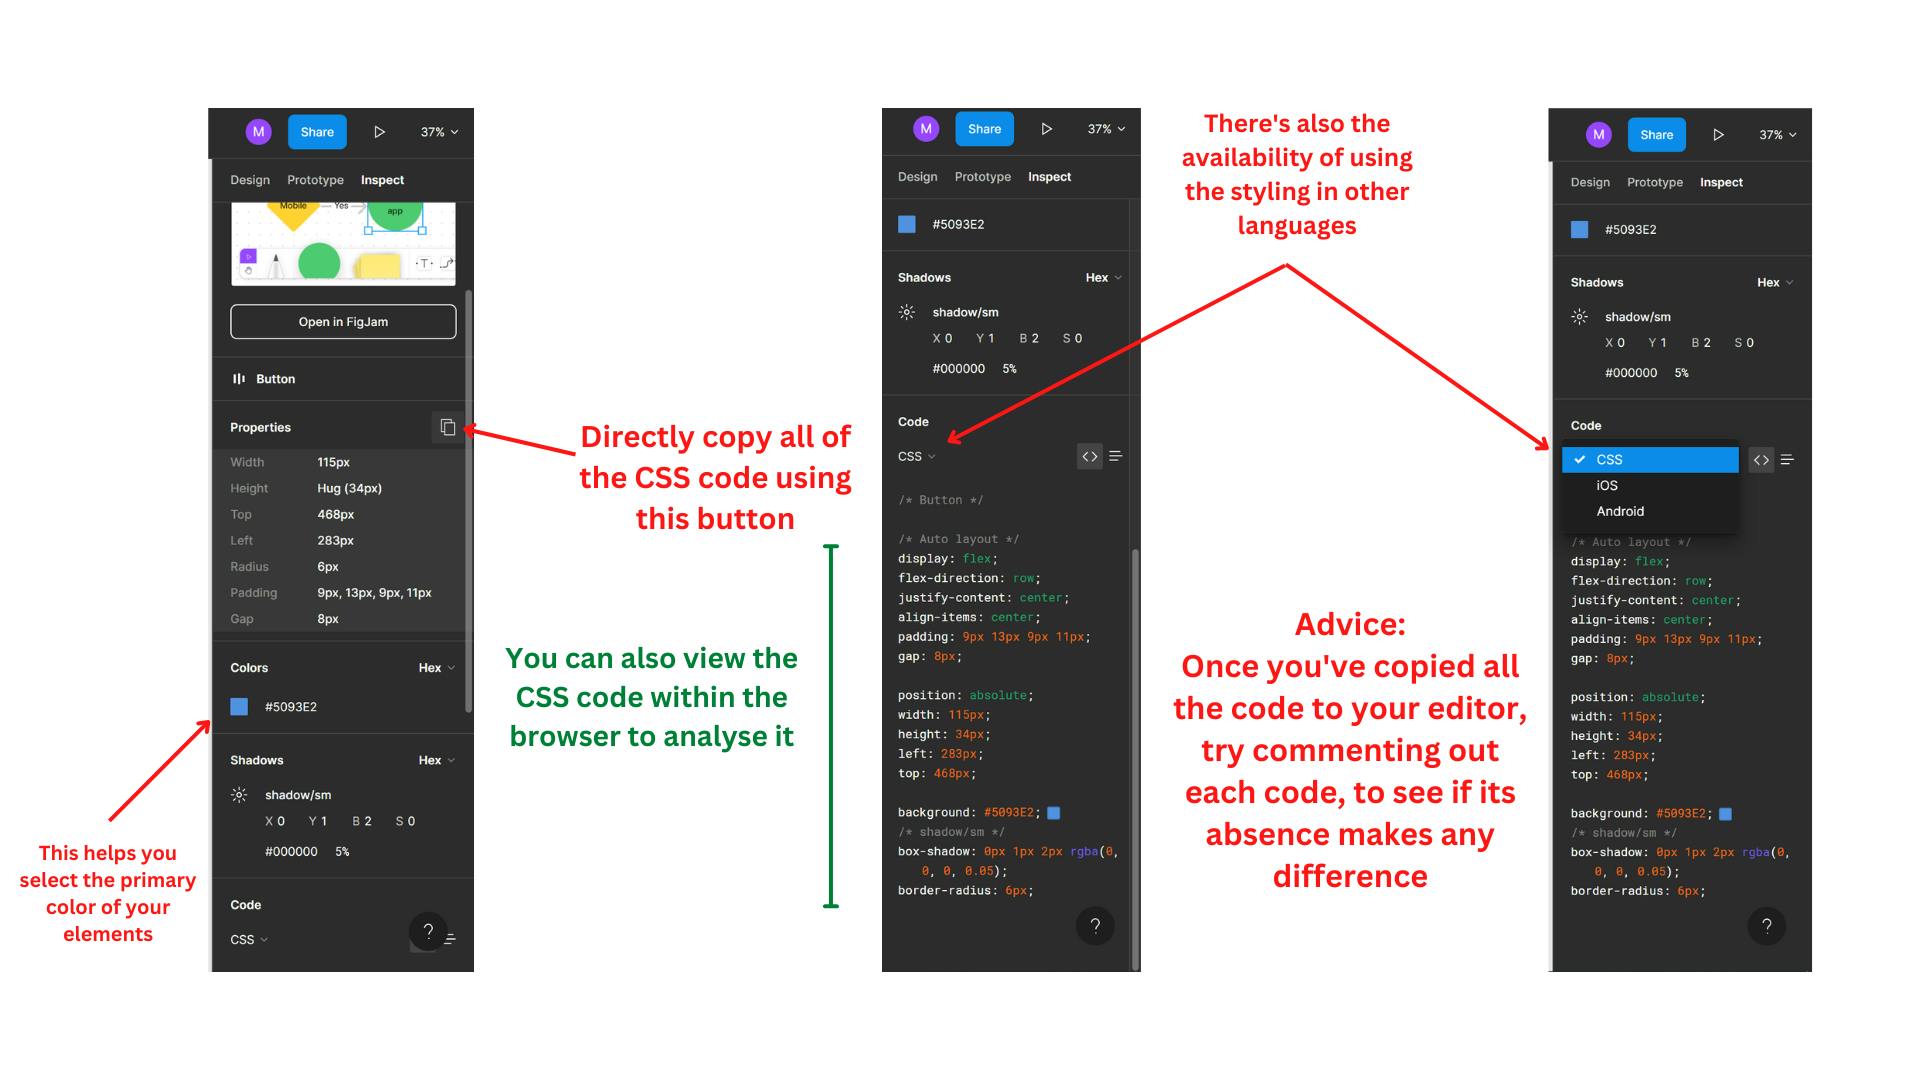
How to find the CSS properties of our desired components
At the end of the same row of your
Designtab, you'll find theInspecttab, as well.You can kinda explore this section, as it'll give you a lot of information that will be helpful for your CSS design.
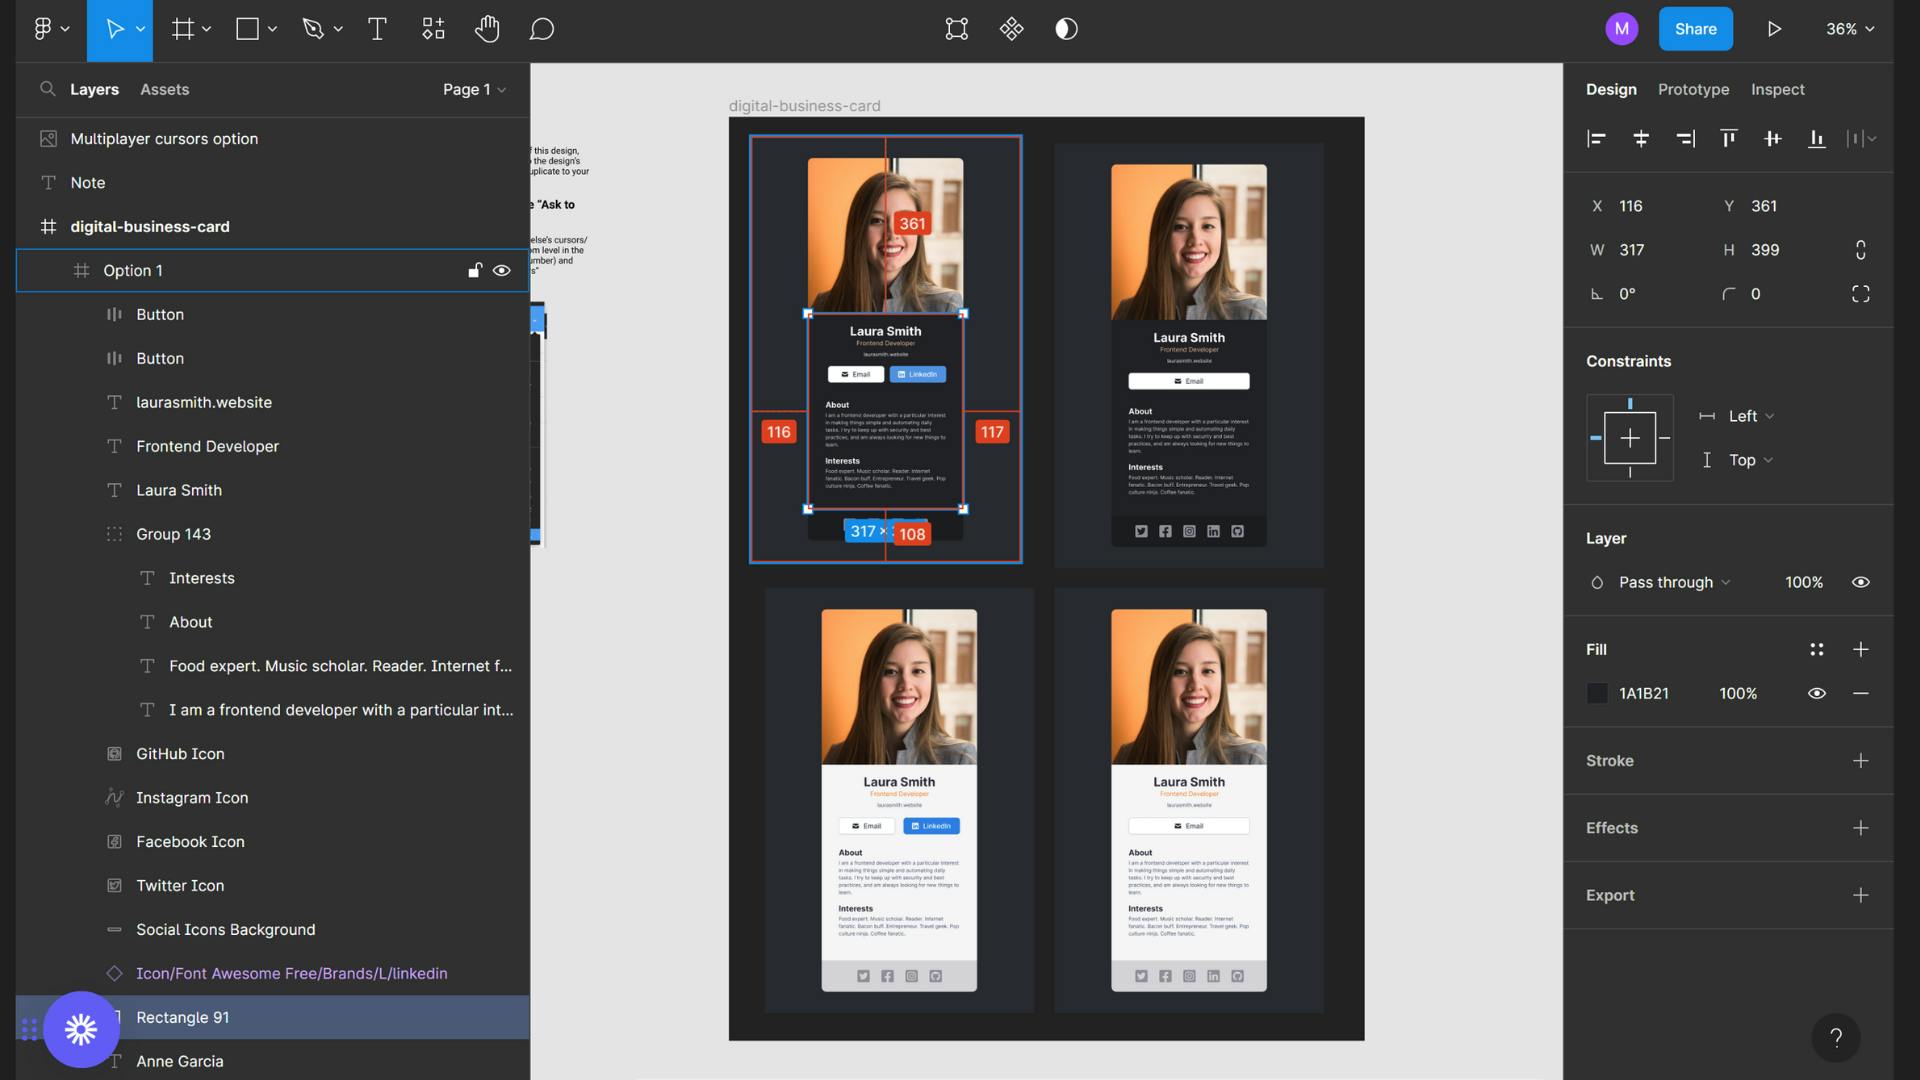
Figuring out the distance between neighboring items (for positioning purposes)
- Select the desired item, you'd want to find a neighboring position to
Hold the
AltorOptionkey based on your PCNow you can move your mouse around to find out its position in px in contrast to the items around it.
YAY! 🥳 You, now, know the dirt basics of Figma. You can now design and code to your heart's content. Here's my GitHub source file in case you want to recreate this project
In the next section, I'll explain how to deploy your site on the web for free!!
Oh wait.. there's one more thing before that.
We'll have to prepare our code for deployment. We'll do this by creating a build/ dist file.
Do you remember how to open up your terminal? Great! We'll have to add some input commands to it, in order to create the file.
cd vite-project
npm run build
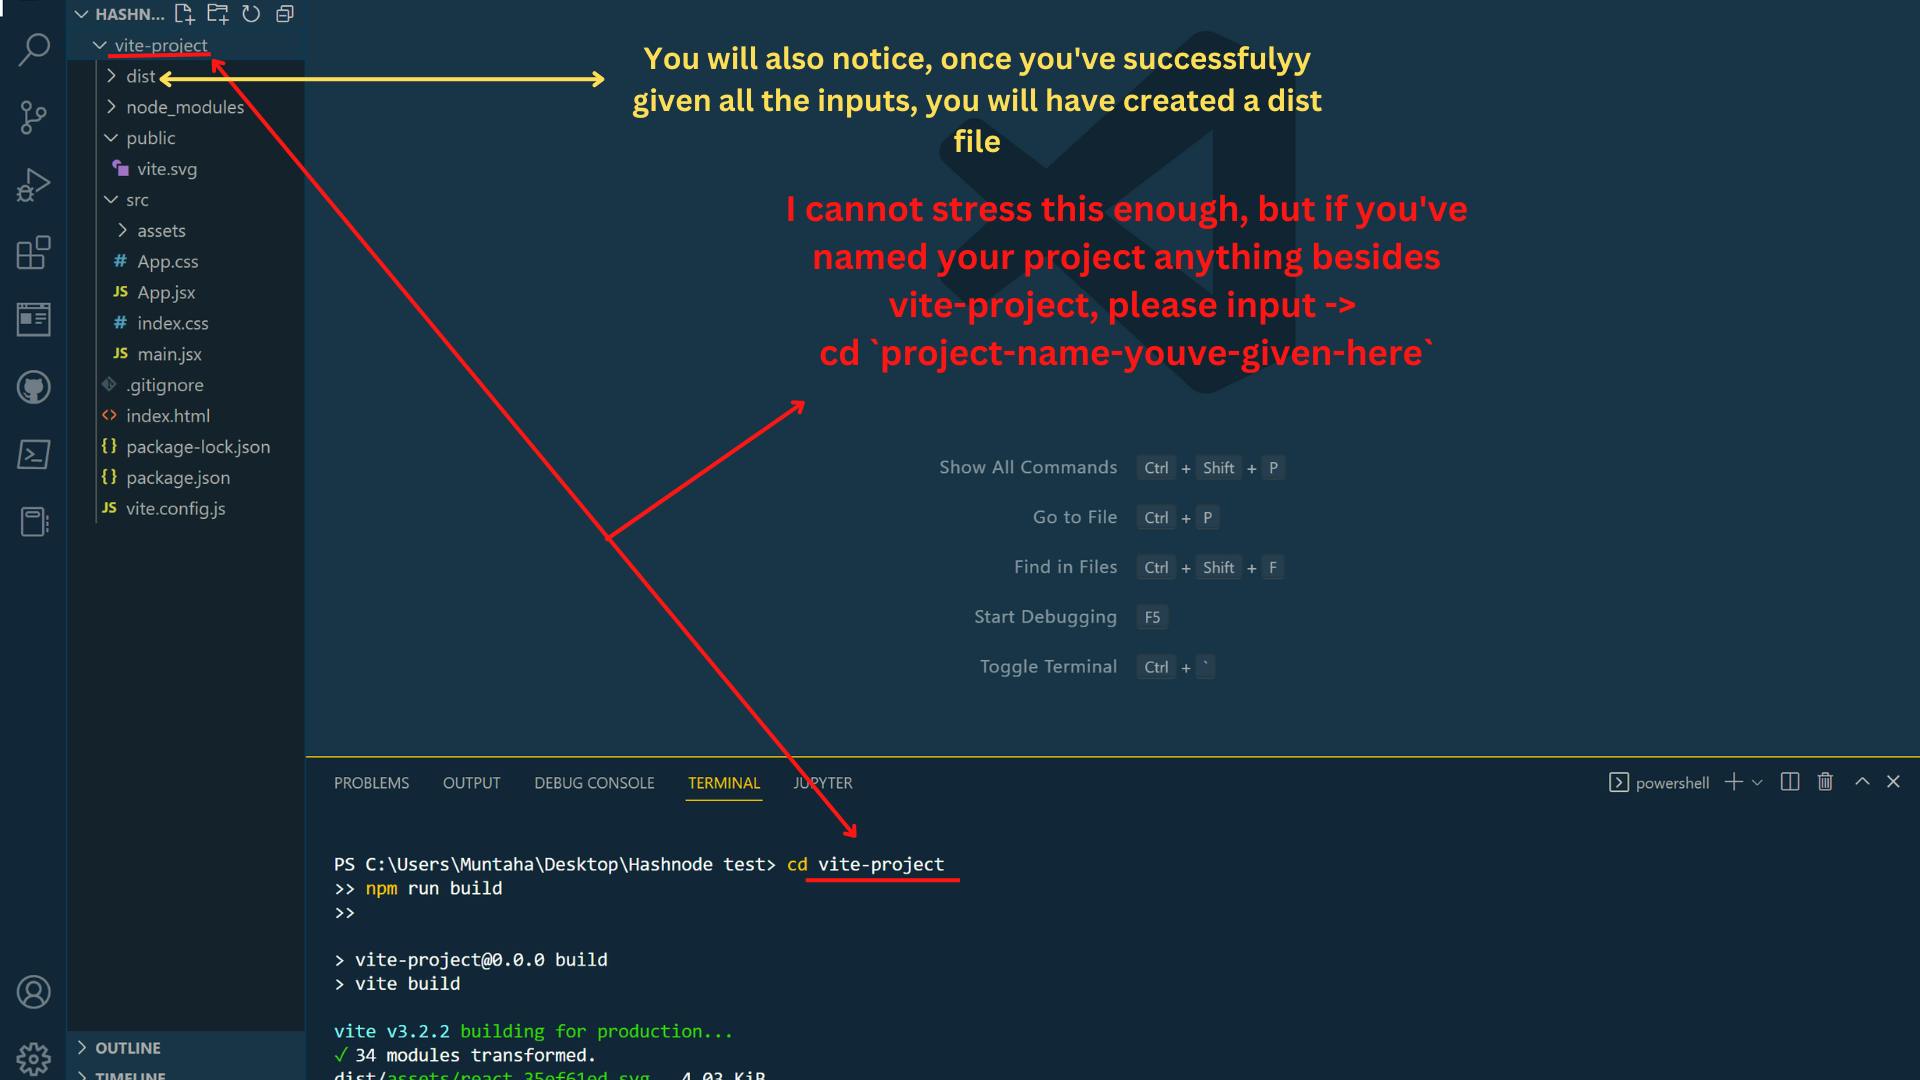
if you don't put in the first command line properly, you will land in a terrible error. That you'll end up wasting 5 days on ( obviously, not speaking from experience)
ok NOW we can move on to deploying our site YAAY 🙌🎊
Netlify: the LOML xD
Reasons I love Netlify? It's SO easy and fast and, best of all? free. Perfect combo for my broke ass.
You'll have to start by making an account, which is relatively simple. So I trust you to do it on your own
We'll then go ahead and choose
manual deployas the method to upload our files. Here's the link, in case you're lost.- You'll then go ahead and choose to go into your project file
- Select your
distfile and Upload
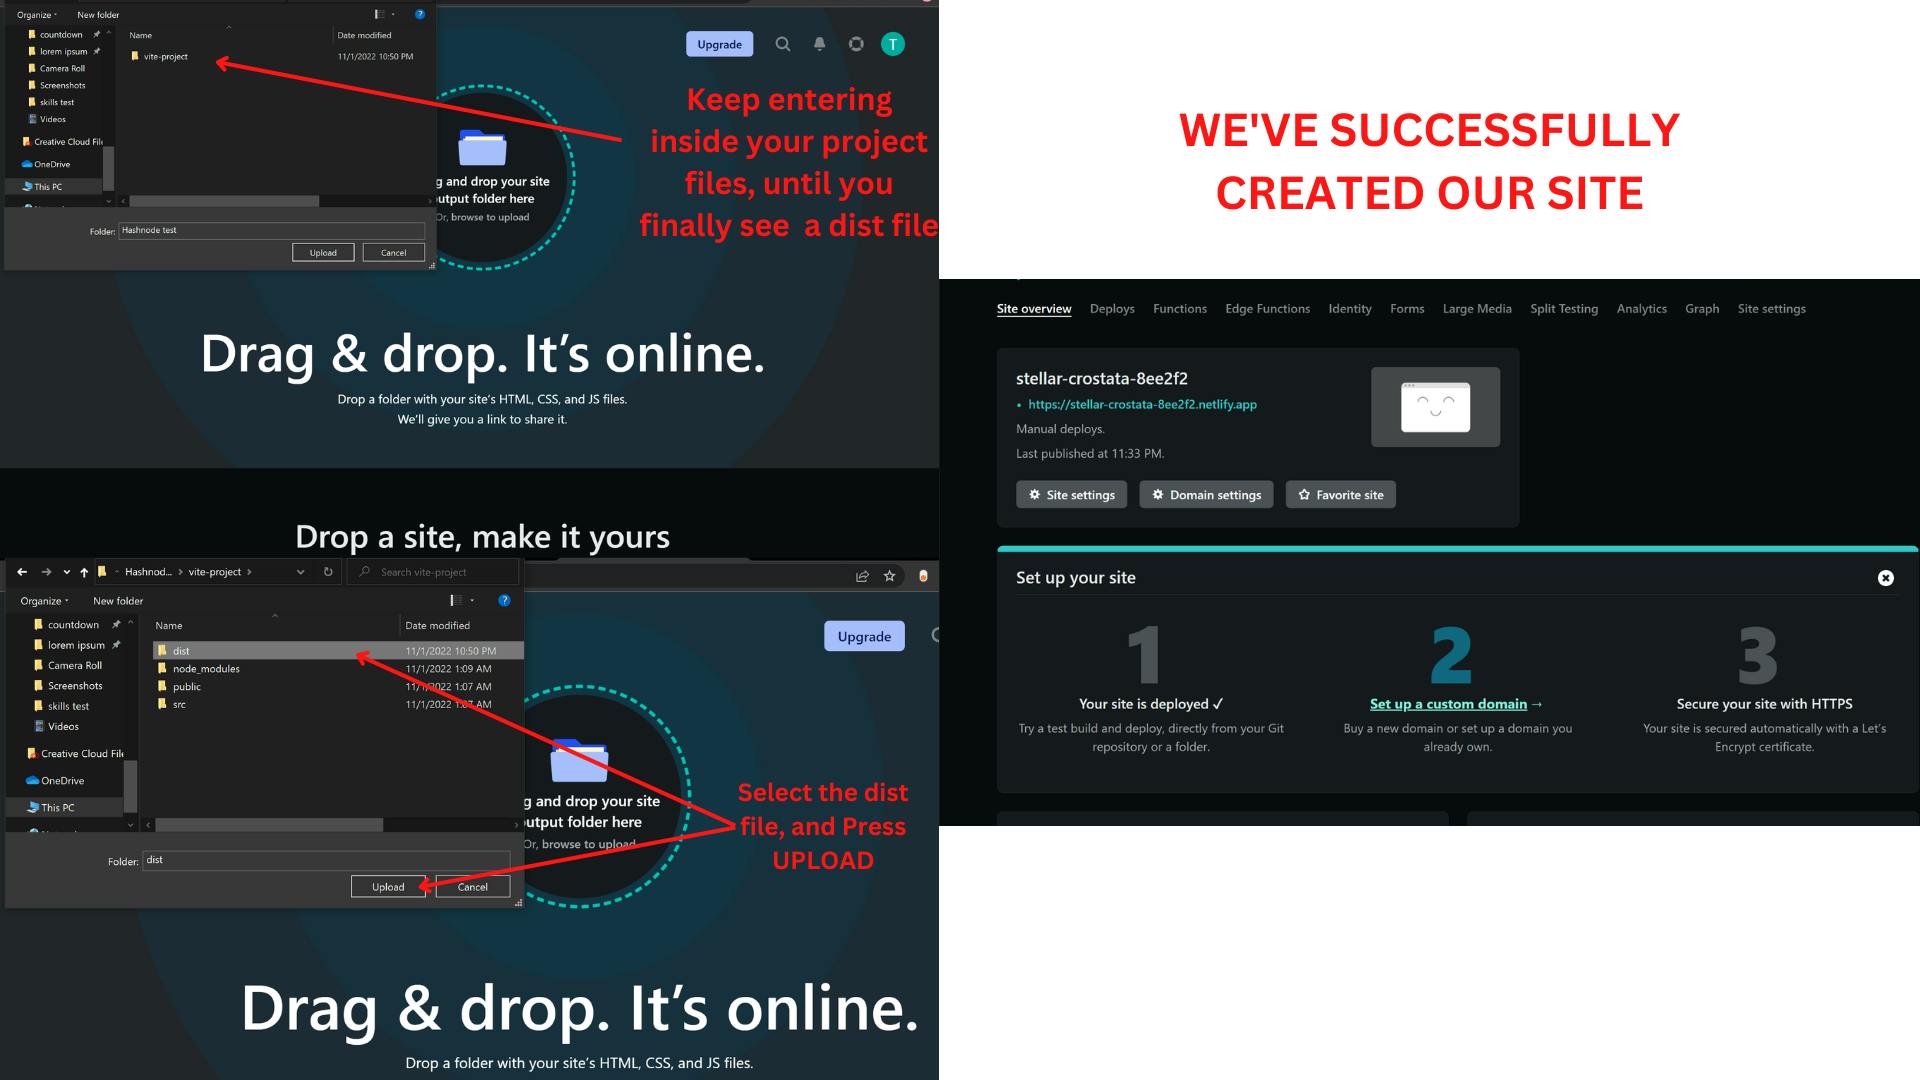
Scrimba has also made an amazing Netlify tutorial, in case you want to check that out
And you've successfully created your website! 🎉 You now have a link to share with your family and friends to show them all your cool work
Bonus Round: Customising your URL 😉
So, we've managed to actually deploy our project, that's cool and all BUT the default URL name has got nothing to do with our actual project. Like what does stellar-crostata even tell us about an app we coded with a blood sacrifice, huh?
Lucky for us, Netlify lets their broke users customize their site name for free, too! Istg, I'll end up catching feelings one of these days, if they continue being so nice LMAOOO
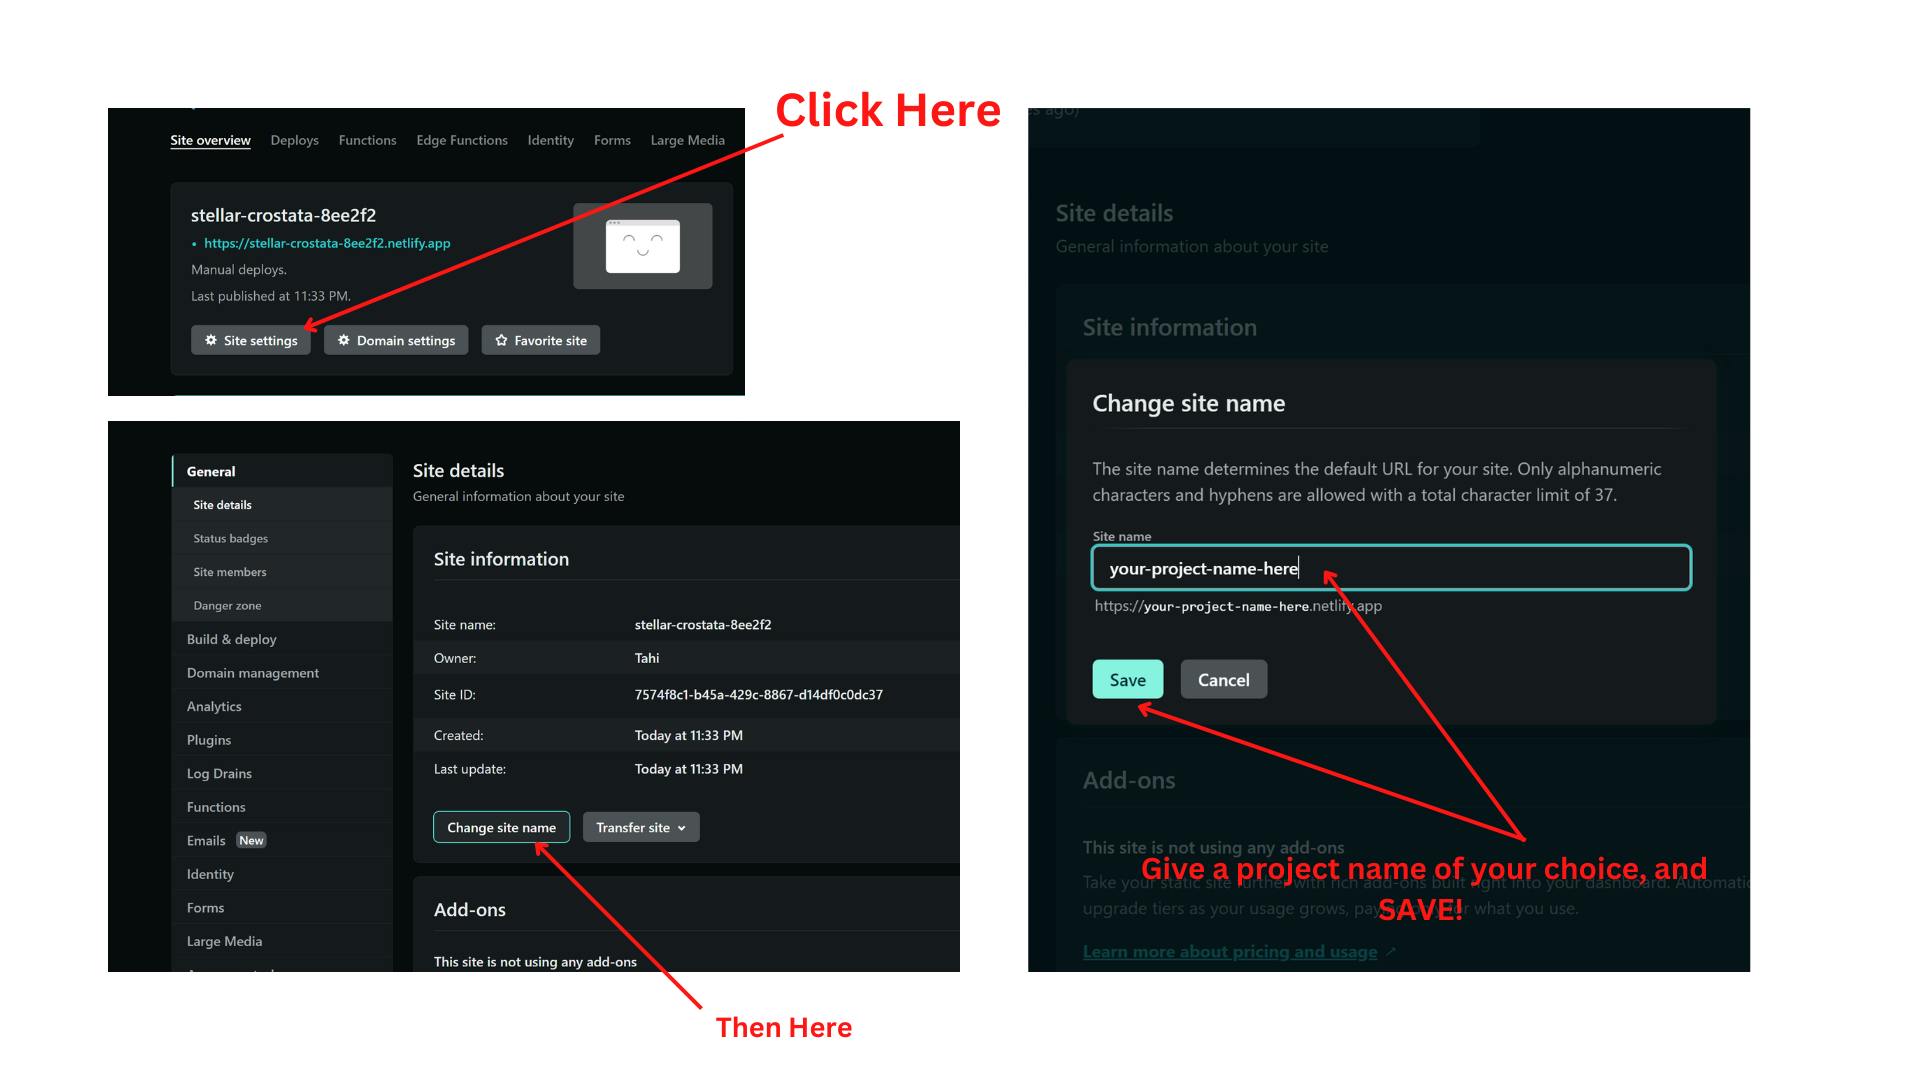
Here's the link to my project, if you'd like to check that out: onlinebusinesscard.netlify.app
We've made it to the end! 🥳
Was the last image tutorial a bit lazy-? Absolutely LMAO. Forgive me but I've been working on this article for nearly 3 days, now. And I've been starting to get a wee bit impatient.
If any of you were wondering how I made the image tutorial thingies, I used Canva, and that was primarily the reason it took me so long to do this article, but hey! I'm trying out new things, even if that is insanely mentally draining, it's also a bit fun, too which is what keeps me going nowadays.
WOW, that took a depressing turn.
Now, don't mind me but I'll be going to sleep rn cause I'm pretty sick, and have been neglecting my health for a while ( I say this now but you'll probably find me scrolling through TikTok, an hour later lol )
I hope this was helpful to at least, one of you. And as always -
Happy Coding! 💖👩💻